> ## Documentation Index
> Fetch the complete documentation index at: https://private-7c7dfe99-detect-table-modification.mintlify.site/llms.txt
> Use this file to discover all available pages before exploring further.
> DbVisualizer is a database tool with extended support for ClickHouse.
# Connecting DbVisualizer to ClickHouse
export const CommunityMaintainedBadge = () => {
return ;
};
export const Image = ({img, alt, size = "lg"}) => {
const normalizedSize = ["sm", "md", "lg"].includes(size) ? size : "lg";
return ;
};
Start or download DbVisualizer
DbVisualizer is available at [https://www.dbvis.com/download/](https://www.dbvis.com/download/)
To connect to ClickHouse with HTTP(S) you need this information:
| Parameter(s) | Description |
| ------------------------- | -------------------------------------------------------------------------------------------------------------- |
| `HOST` and `PORT` | Typically, the port is 8443 when using TLS or 8123 when not using TLS. |
| `DATABASE NAME` | Out of the box, there is a database named `default`, use the name of the database that you want to connect to. |
| `USERNAME` and `PASSWORD` | Out of the box, the username is `default`. Use the username appropriate for your use case. |
The details for your ClickHouse Cloud service are available in the ClickHouse Cloud console.
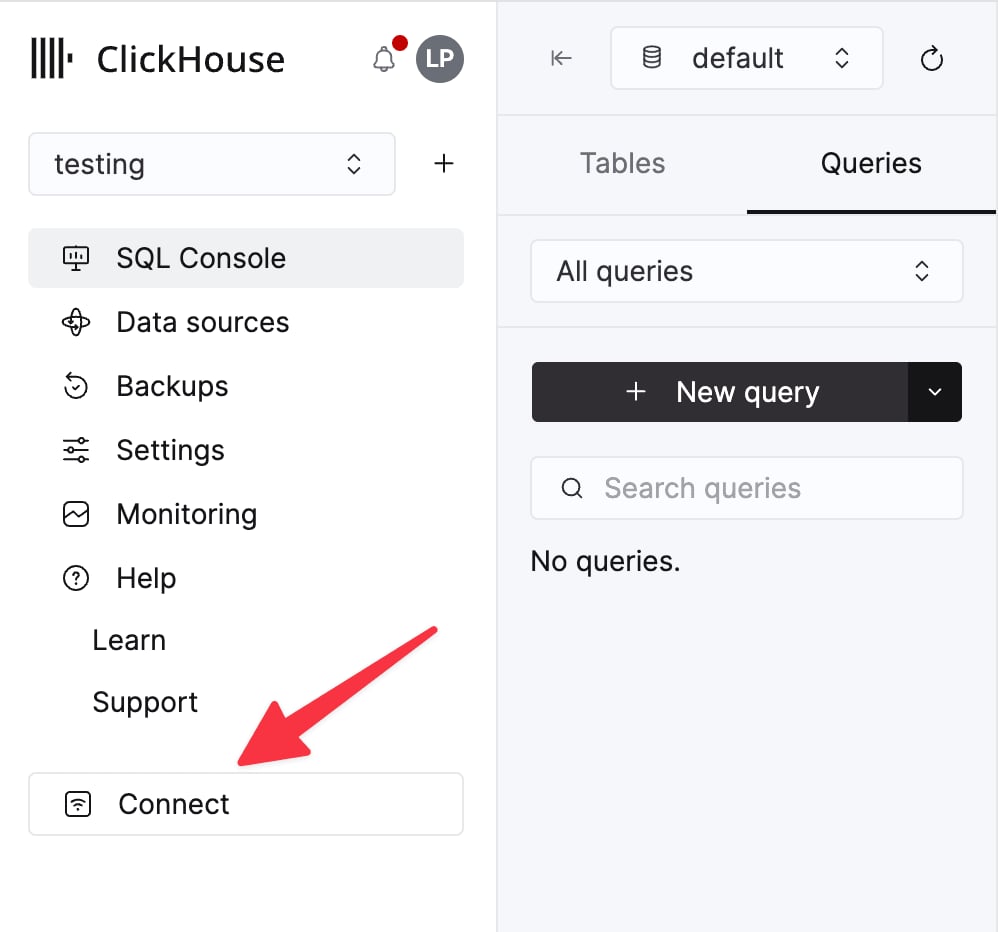
Select a service and click **Connect**:
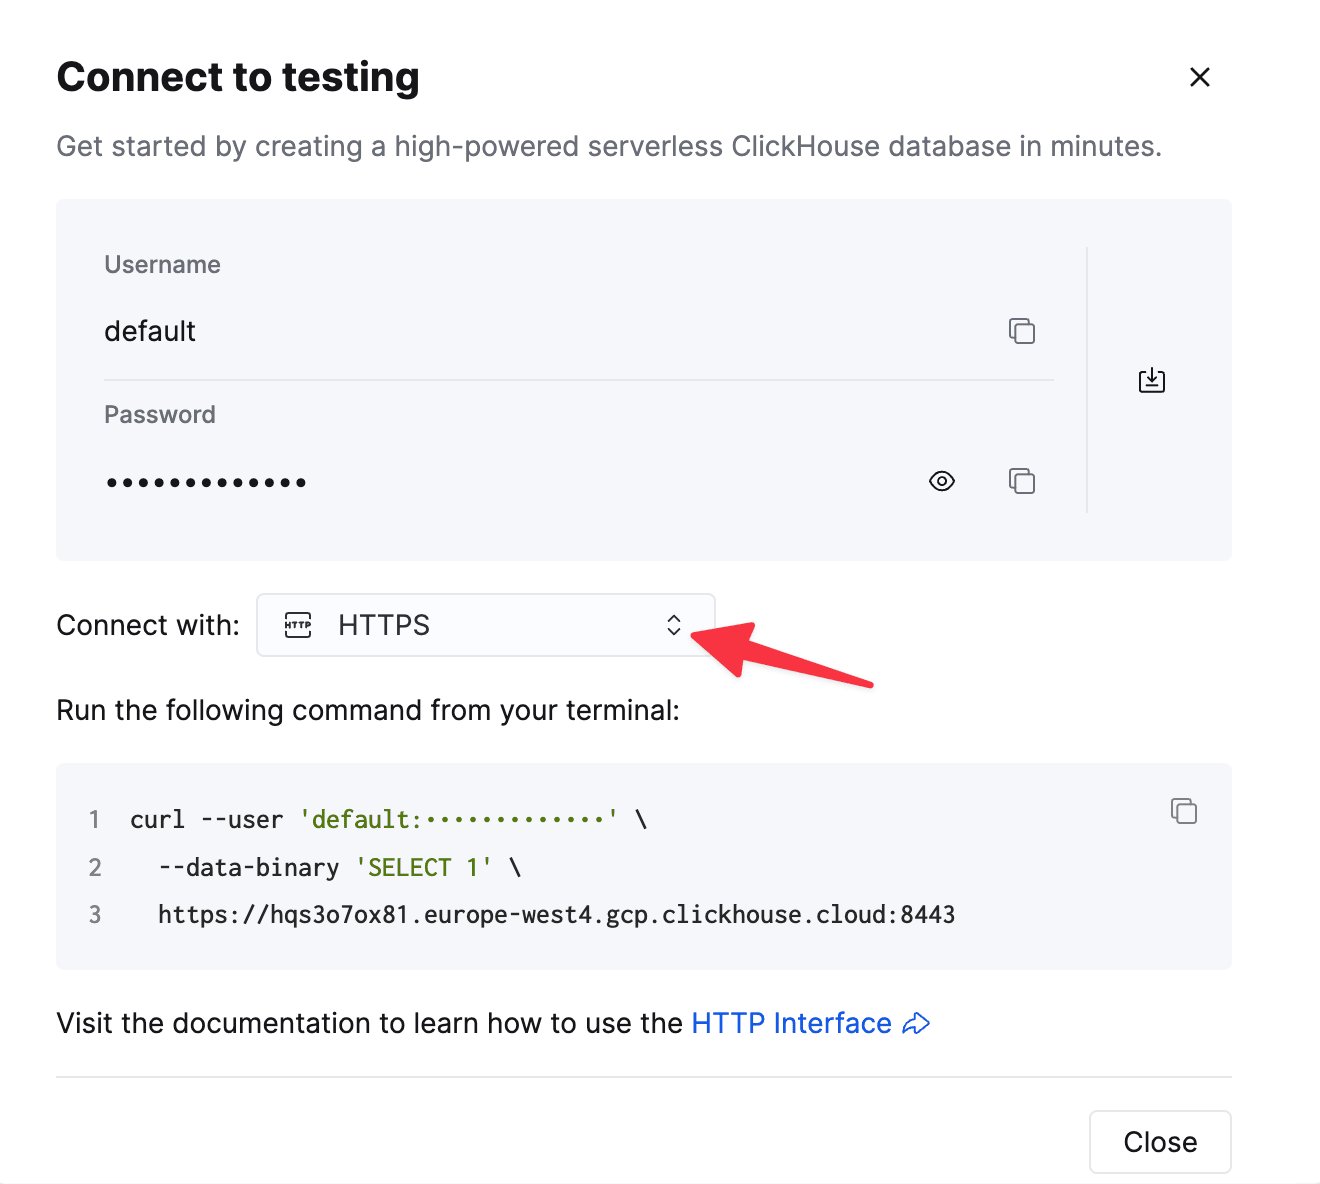
Choose **HTTPS**. Connection details are displayed in an example `curl` command.
If you're using self-managed ClickHouse, the connection details are set by your ClickHouse administrator.
DbVisualizer has the most up-to-date JDBC drivers for ClickHouse included. It has full JDBC driver management built right in that points to the latest releases as well as historical versions for the drivers.
To connect a database with DbVisualizer, you must first create and setup a Database Connection.
1. Create a new connection from **Database->Create Database Connection** and select a driver for your database from the popup menu.
2. An **Object View** tab for the new connection is opened.
3. Enter a name for the connection in the **Name** field, and optionally enter a description of the connection in the **Notes** field.
4. Leave the **Database Type** as **Auto Detect**.
5. If the selected driver in **Driver Type** is marked with a green check mark then it is ready to use. If it isn't marked with a green check mark, you may have to configure the driver in the **Driver Manager**.
6. Enter information about the database server in the remaining fields.
7. Verify that a network connection can be established to the specified address and port by clicking the **Ping Server** button.
8. If the result from Ping Server shows that the server can be reached, click **Connect** to connect to the database server.
See [Fixing Connection Issues](https://www.dbvis.com/docs/ug/troubleshooting/fixing-connection-issues/) for some tips if you have problems connecting to the database.
Learn more
Find more information about DbVisualizer visit the [DbVisualizer documentation](https://www.dbvis.com/docs/ug/).