

Connection data required
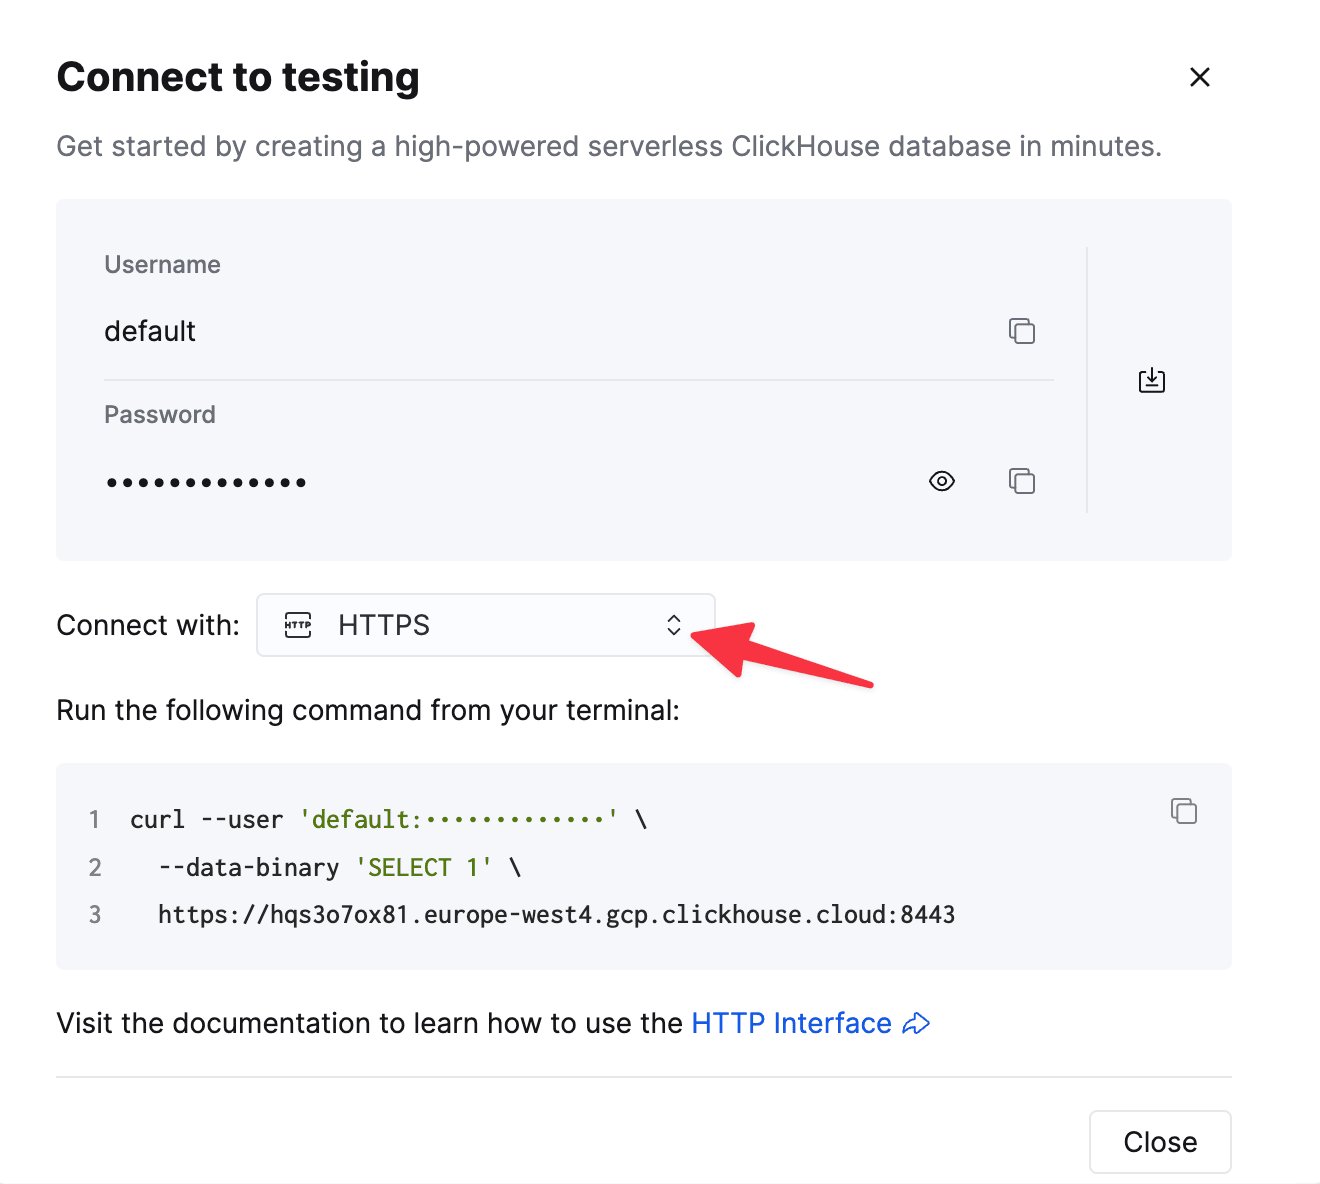
When setting up your data connection, you’ll need to know:- Data connection: Hostname, Port
- Database Credentials: Username, Password
The details for your ClickHouse Cloud service are available in the ClickHouse Cloud console.
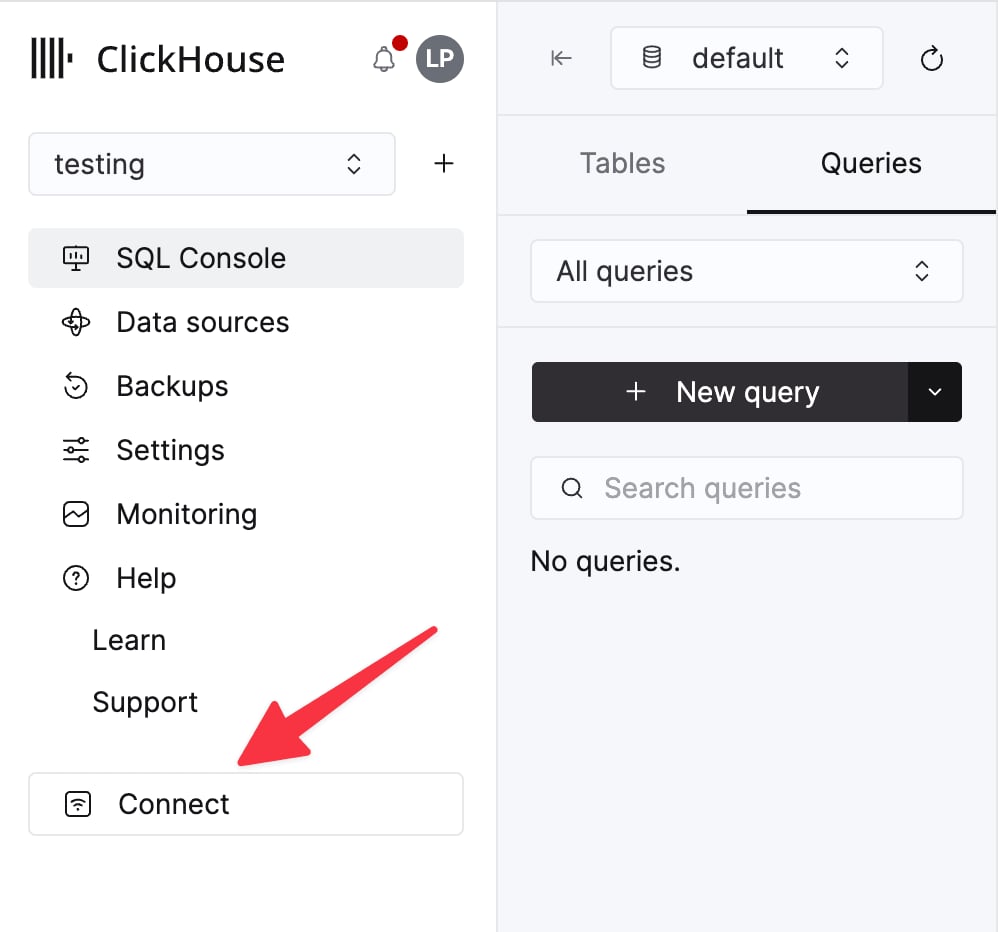
Select a service and click Connect:
curl command.
Creating the data connection to ClickHouse
- Select Data in the sidebar, and select the Data Connection tab (or, navigate to this link: https://app.astrato.io/data/sources)
- Click on the New Data Connection button in the top right side of the screen.
- Select ClickHouse.
- Complete the required fields in the connection dialogue box
- Click Test Connection. If the connection is successful, give the data connection a name and click Next.
- Set the user access to the data connection and click connect.
- A connection is created and a dataview is created.
if a duplicate is created, a timestamp is added to the data source name.
Creating a semantic model / data view
In our Data View editor, you will see all of your Tables and Schemas in ClickHouse, select some to get started. Now that you have your data selected, go to define the data view. Click define on the top right of the webpage. In here, you’re able to join data, as well as, create governed dimensions and measures - ideal for driving consistency in business logic across various teams. Astrato intelligently suggests joins using your meta data, including leveraging the keys in ClickHouse. Our suggested joins make it easy for you to gets started, working from your well-governed ClickHouse data, without reinventing the wheel. We also show you join quality so that you have the option to review all suggestions, in detail, from Astrato.Creating a dashboard
In just a few steps, you can build your first chart in Astrato.- Open visuals panel
- Select a visual (lets start with Column Bar Chart)
- Add dimensions
- Add measures